TEAM
The Team section lets you share your AI avatar project with other people – invite teammates, control what each of them can do, and review every change made to the project. It’s useful whenever more than one person manages the same avatar.
Access is governed by three roles:
- Owner – the project creator. Full access, including the activity log. The owner role can’t be reassigned to anyone else.
- Editor – can edit project settings and content, and manage teammates (invite, change roles, remove).
- Reader – can view the project and the team, but can’t modify anything.
Here’s what you can do in this section:
People
The People list shows everyone with access to the project. The owner is pinned at the top with an Owner badge, followed by every teammate and their current role.
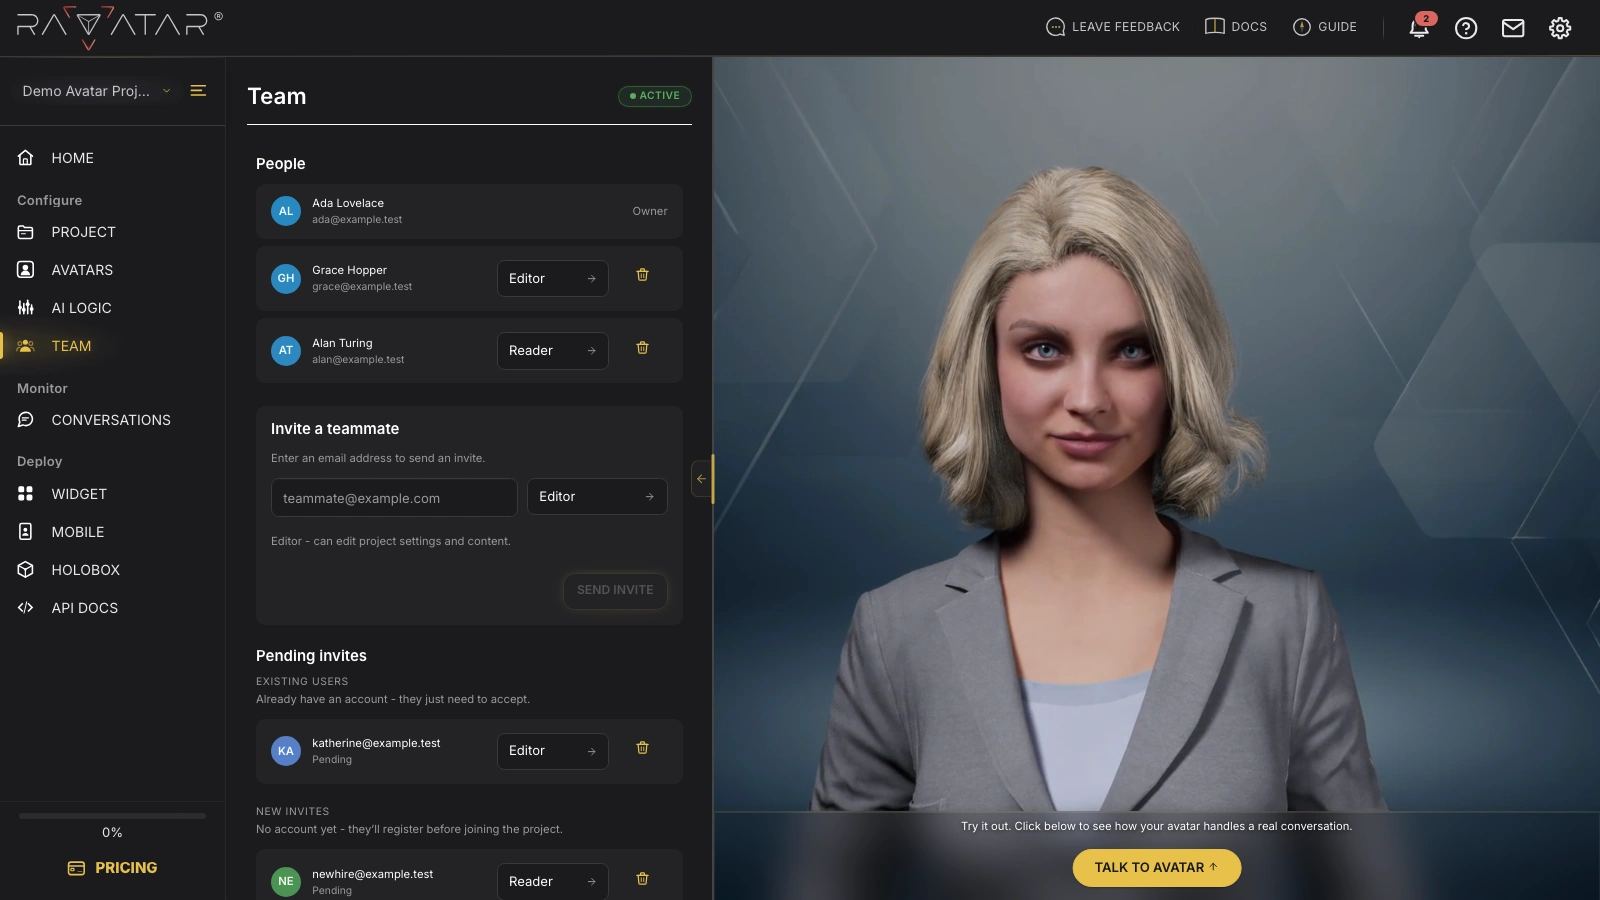
If you’re an owner or editor, each teammate row includes a role dropdown and a Remove button:
- To change someone’s access, pick Editor or Reader from the role dropdown. The new role applies immediately.
- To remove a teammate, click Remove and confirm in the Remove from project? dialog. They lose access right away, though you can always invite them back later.
Readers see the same list without the role dropdown or Remove button. You also can’t change your own role or remove yourself from a project.
Before you add anyone, the list shows only the owner along with the hint "No collaborators yet. Invite teammates below."
Invite a Teammate
Owners and editors bring new people into the project from the Invite a teammate panel. Readers don’t see this panel at all.
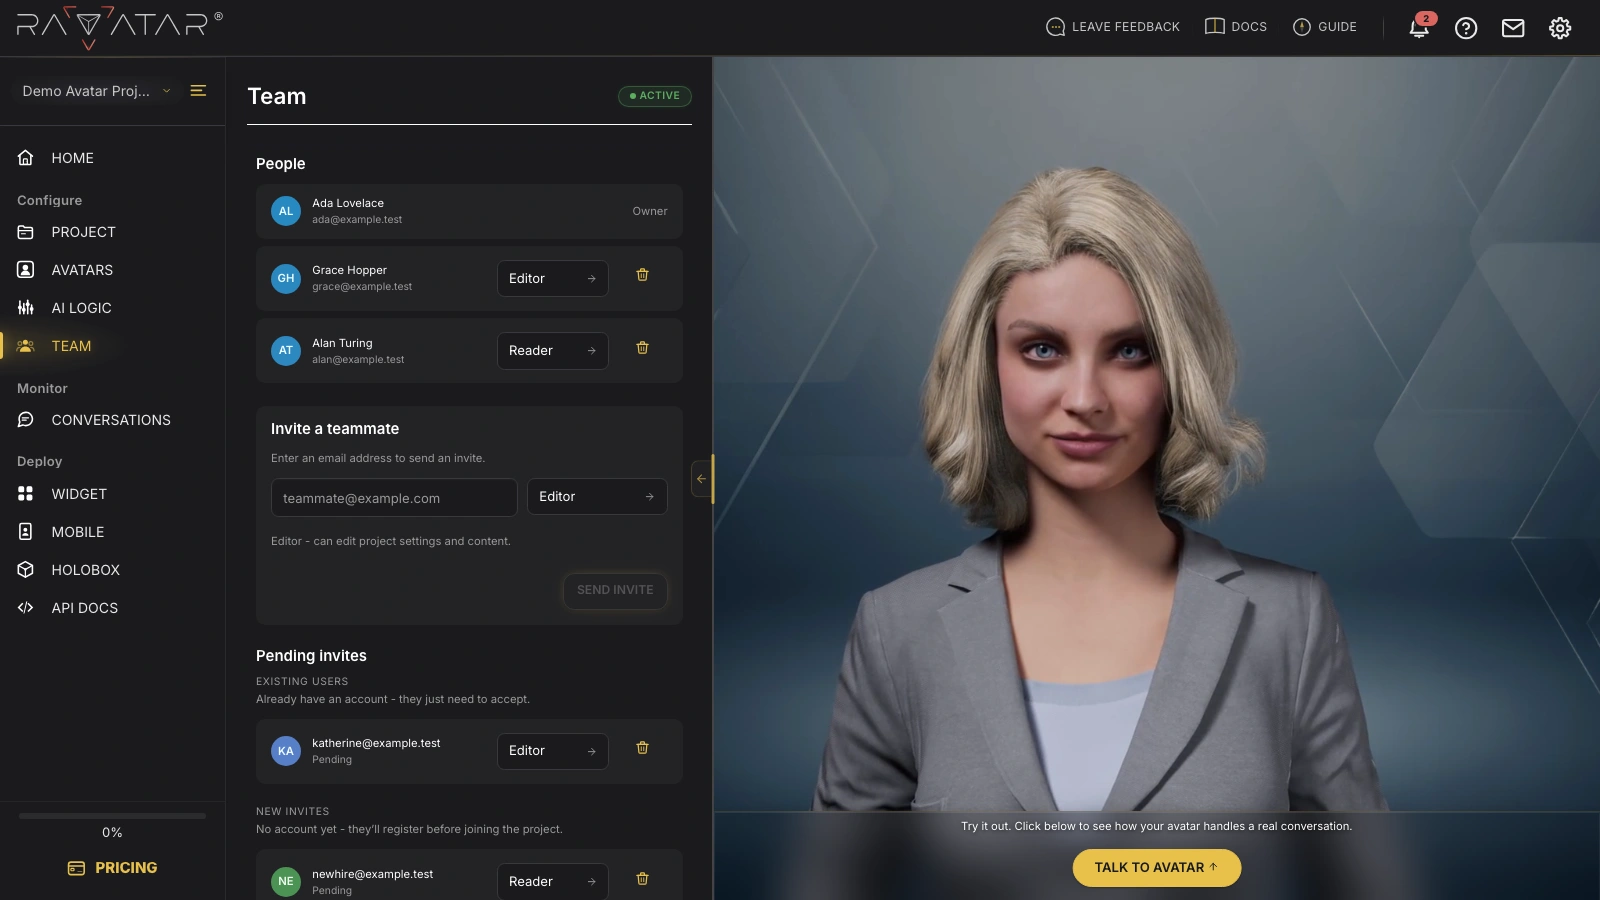
To send an invite:
- In the Email field, enter the address of the person you want to invite.
- From the role dropdown next to the field, pick Editor or Reader. A short description below the form explains what each role can do.
- Click Send invite. The teammate is added to Pending invites until they accept the invitation.
You don’t need to check whether the address already has a Genesis Studio account – the platform resolves it automatically and files the invitation under the matching Pending invites group.
There’s no limit on how many teammates you can invite.
You can only assign the Editor or Reader role when inviting – the Owner role can’t be granted to anyone else.
Pending Invites
Every invitation that hasn’t been accepted yet appears under Pending invites, split into Existing users (people who already have a Genesis Studio account) and New invites (brand-new email addresses).
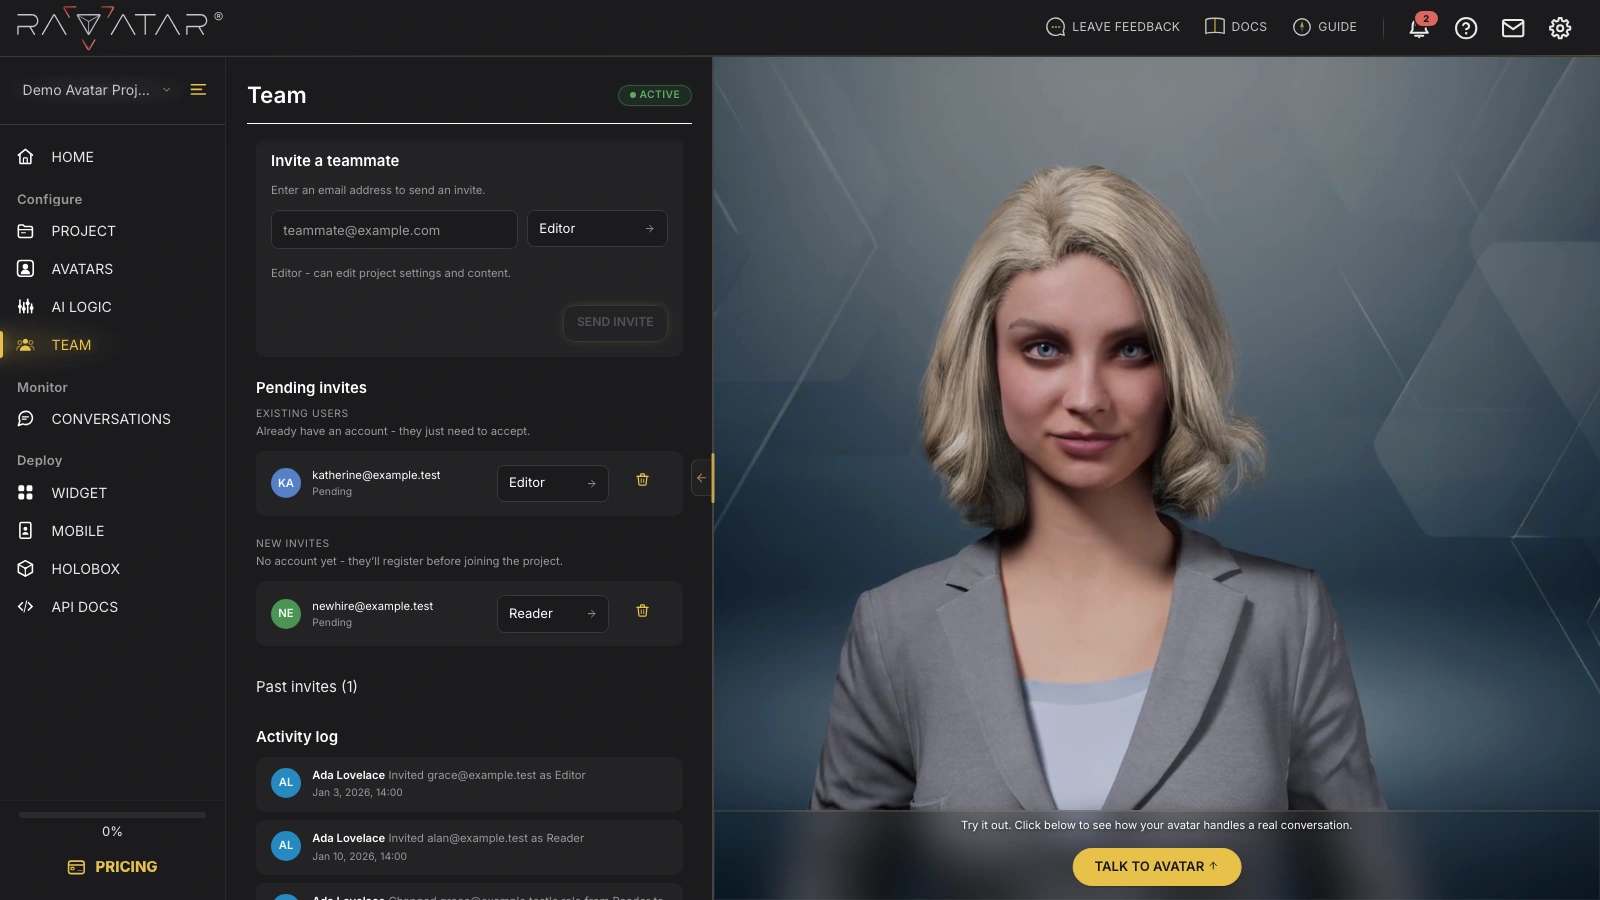
Each row shows the invitee’s email, a Pending status badge, and how soon the invite expires (it switches to Expires soon as the deadline approaches). Owners and editors can change a pending invite’s role or click Cancel invite to revoke it.
There’s no resend action. To refresh a stale invite, cancel it and send a new one from Invite a teammate.
When there are no open invitations, the section simply shows the message "No pending invites."
Past Invites
Past invites is a collapsible list of every invitation that’s no longer pending – accepted, declined, expired, converted, or removed. It’s read-only history, so there are no controls here.
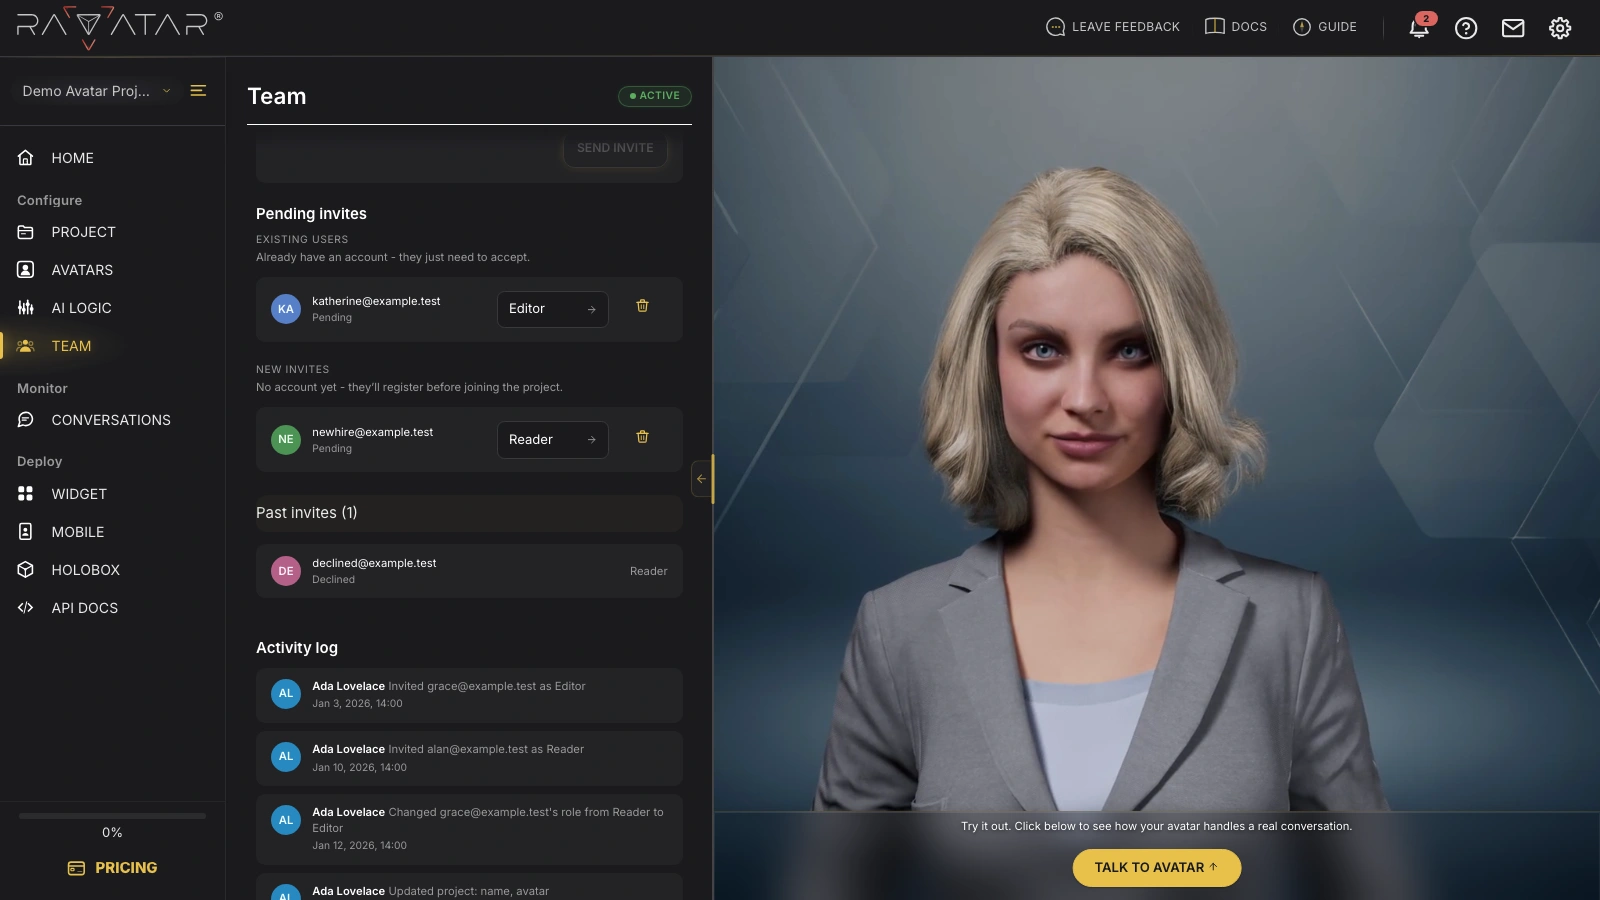
The heading shows how many past invitations exist, for example Past invites (6). Click it to expand the list; each row keeps its final status badge. The section is hidden entirely until there’s some past activity to show.
Activity Log
The Activity log is an audit trail of everything that happens to the project – who invited or removed a teammate, who changed a role, and which project settings were updated.
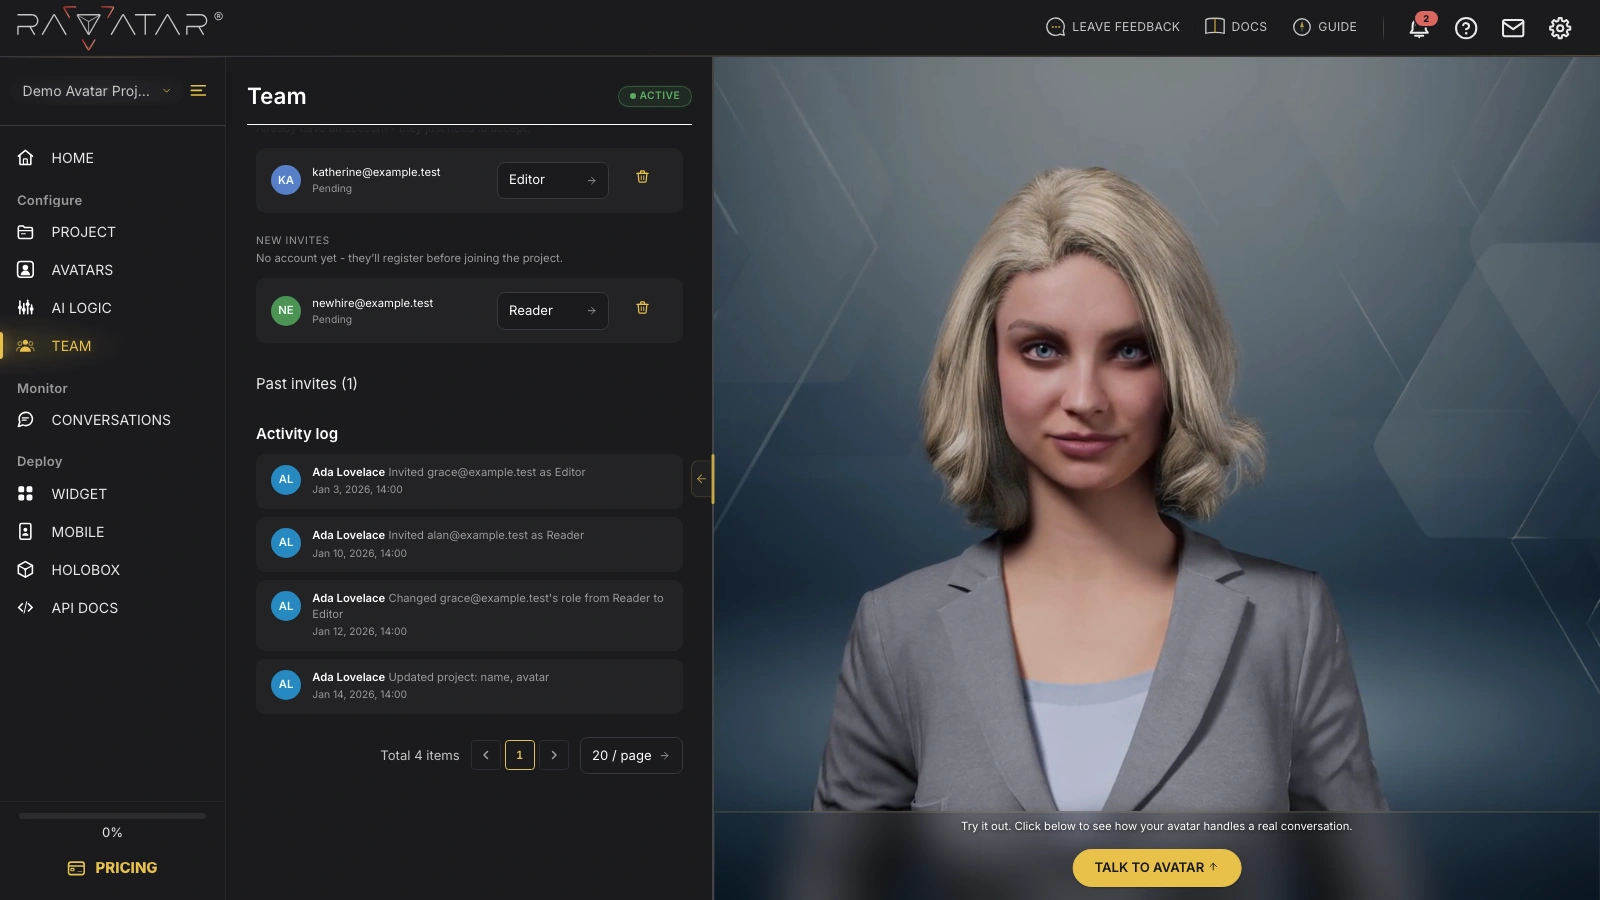
Each entry names the person and what they did, for example "Invited teammate@example.com as Editor" or "Updated project: name, avatar". For a project change, click the entry to expand a before-and-after view of each updated field. Use the pagination control at the bottom to move through older entries.
Only the project owner can see the Activity log. Editors and readers don’t have access to it.
Managing your team sits alongside the rest of your setup – head back to the PROJECT section to adjust the project’s core settings, pricing, and subscription.