Custom Avatar from Photos
If none of the ready-made characters fit your project, the RAVATAR team can build an AI avatar from photos you supply. This page explains what to photograph, what the uploader accepts, and how to send the request from Genesis Studio.
The photos are the request. Genesis Studio will not send it with fewer than three photos, and it accepts at most ten – so plan the shoot around that range before you open the wizard.
- What RAVATAR Builds for You
- What to Photograph
- File Requirements
- Pre-Submission Checklist
- Submitting Your Request
- When Something Is Wrong
What RAVATAR Builds for You
Your photos become a character built for your project instead of one picked from the list. Everything else you configure in the wizard – voice, languages, AI logic, integrations – works the same way it does for a ready-made avatar. Once your request arrives, our team reviews it and writes to the email address on your account to talk the project through.
Creating a fully custom AI-driven digital human is a complex, multi-stage process involving in-depth design work, advanced AI configuration, and meticulous testing to ensure a flawless result. Due to the specialized expertise and resources required, pricing starts at €5,000 for a Proof-of-Concept project. Additional capabilities, integrations, or enterprise-grade requirements may incur extra costs depending on scope.
What to Photograph
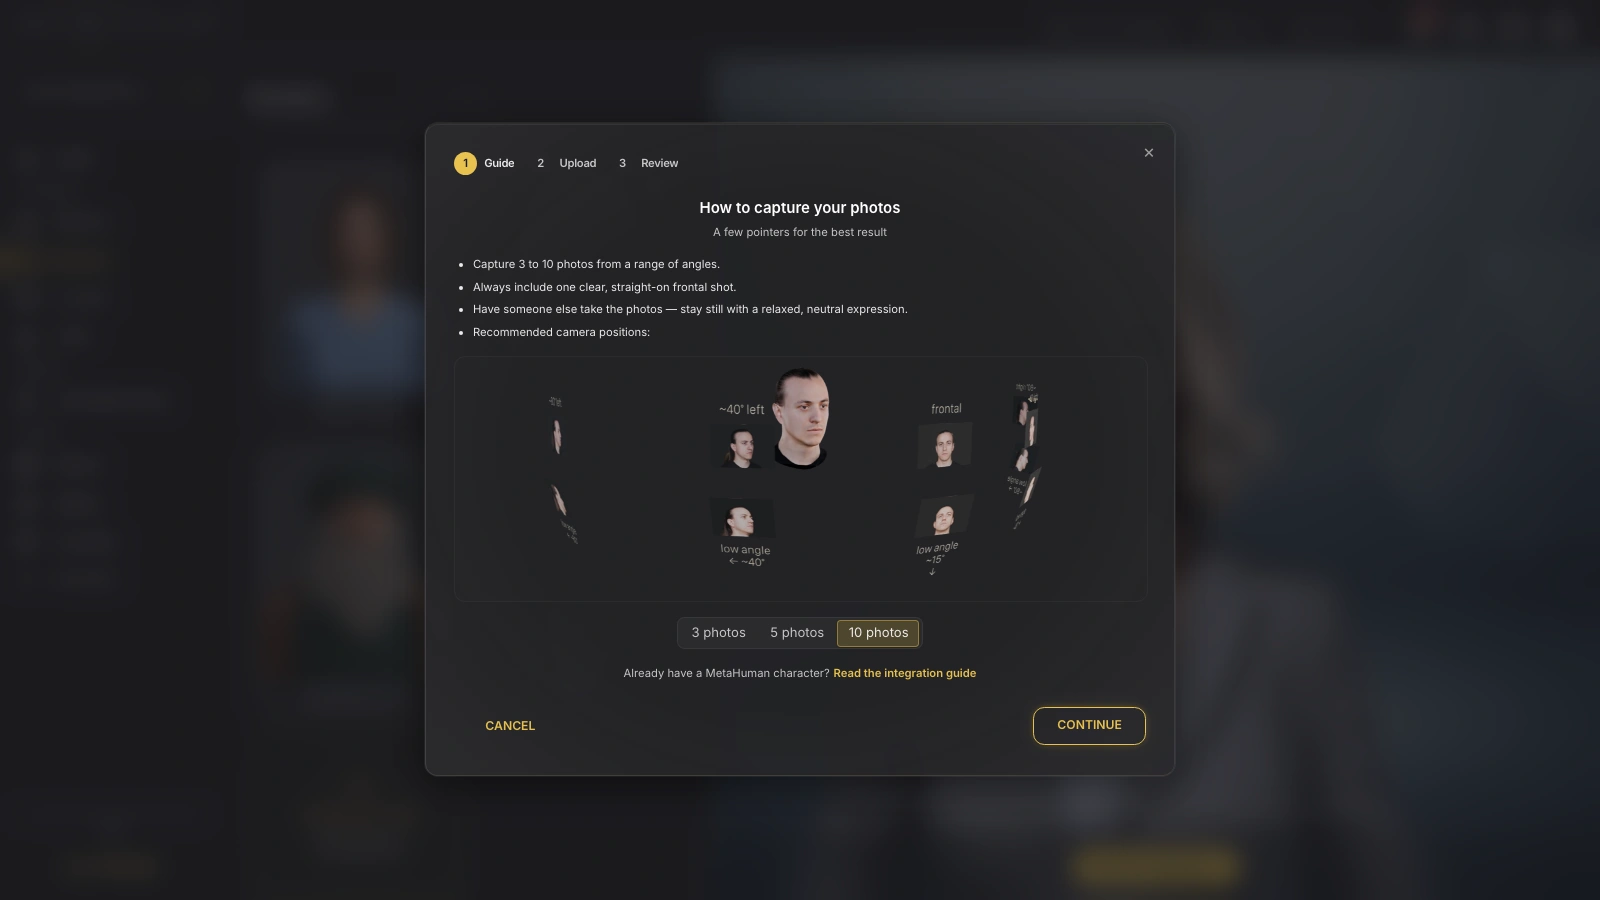
The first step of the wizard, Guide, is a capture brief: a few pointers and a looping render that demonstrates the recommended camera positions. Nothing is uploaded on this step – read it before you take the photos.
- Capture three to ten photos from a range of angles.
- Always include one clear, straight-on frontal shot.
- Have someone else take the photos, and stay still with a relaxed, neutral expression.
The render under the pointers is where the camera positions are shown. Use the 10 photos / 5 photos / 3 photos control below it to switch the render between a ten-, five- and three-photo shoot:
| Preset | What the render walks through |
|---|---|
| 10 photos | A ten-photo shoot. This is the render the step opens with. |
| 5 photos | A five-photo shoot. |
| 3 photos | A three-photo shoot – the fewest photos a request can be sent with. |
Switching the preset changes the render only. It does not limit or preselect anything – how many photos you send is decided on the next step, by how many you upload.
File Requirements
| Requirement | What the uploader accepts |
|---|---|
| Number of photos | At least 3, at most 10 |
| Formats | JPG, PNG, WebP, GIF, AVIF |
| File size | No limit is enforced – the Review step reports the total size of what you are sending |
| Brief description | Optional free text, no length limit |
Formats outside that list are refused as you add them, so convert anything else – a HEIC photo straight off an iPhone, for example – before you upload it.
Pre-Submission Checklist
Every point below comes from the in-app capture brief and the uploader’s own limits. Run through it before you open the wizard.
- Between 3 and 10 photos are ready.
- At least one of them is a clear, straight-on frontal shot.
- The set covers a range of angles, following the positions in the render.
- Someone else took the photos while you stayed still, with a relaxed, neutral expression.
- Every file is a JPG, PNG, WebP, GIF or AVIF.
- You know what to put in the brief description: purpose, style, use case, or specific needs.
Submitting Your Request
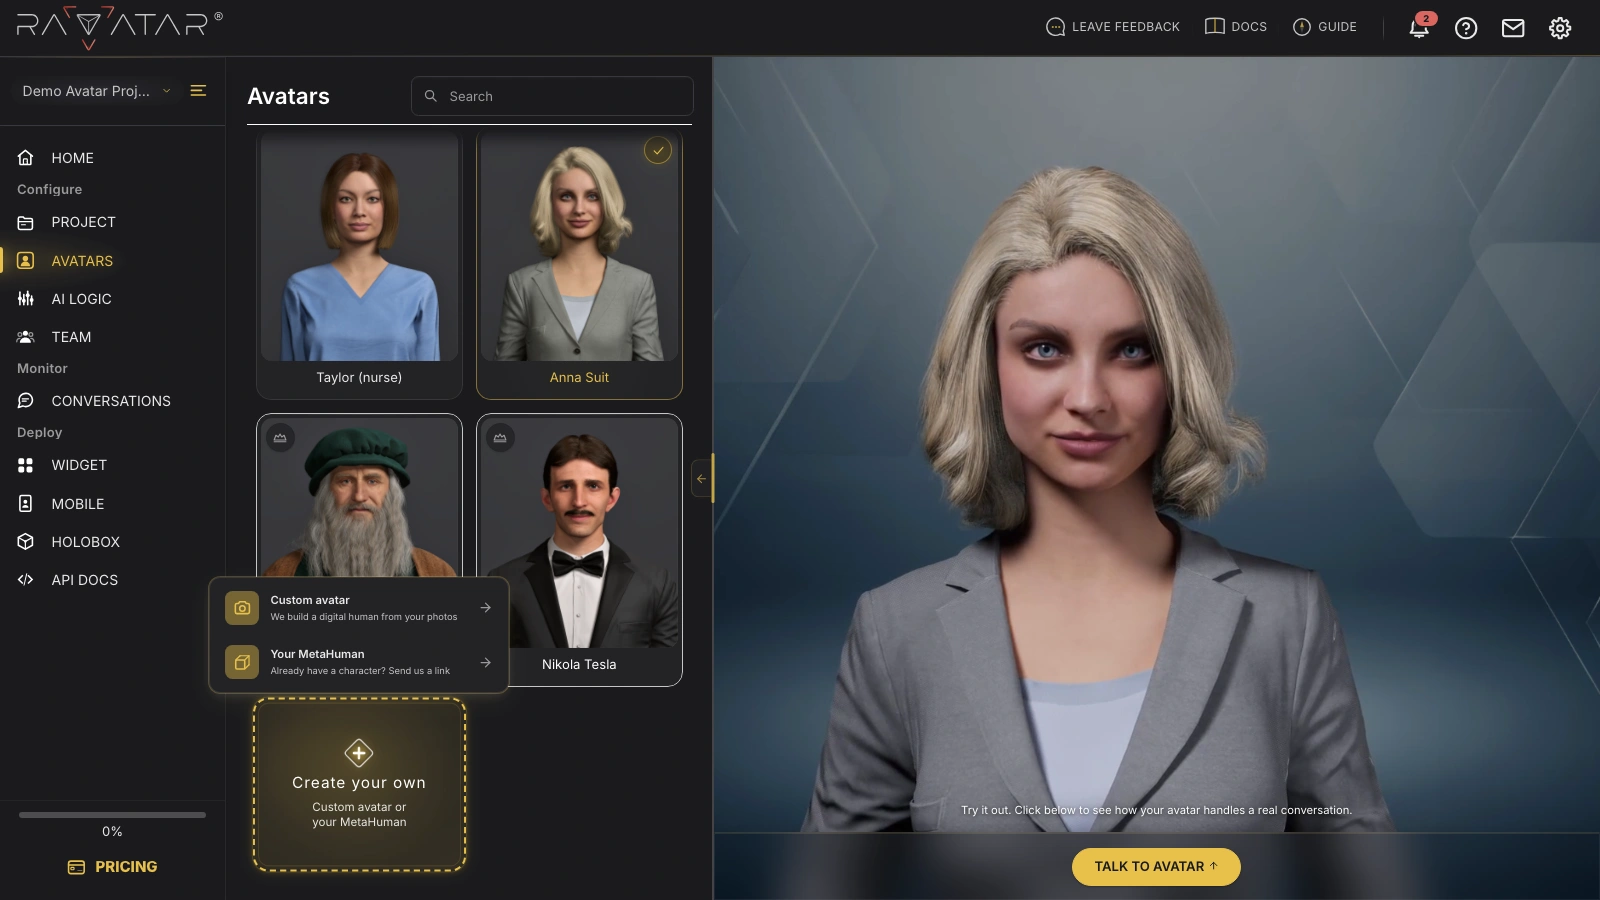
To start, open the AVATARS wizard section, click the Create your own tile at the end of the characters list, and choose Custom avatar:
The request opens as a three-step wizard, with Guide, Upload and Review marked across the top of the dialog.
-
On Guide, read the capture pointers and the render of the recommended camera positions. Click Continue once your photos are ready.
-
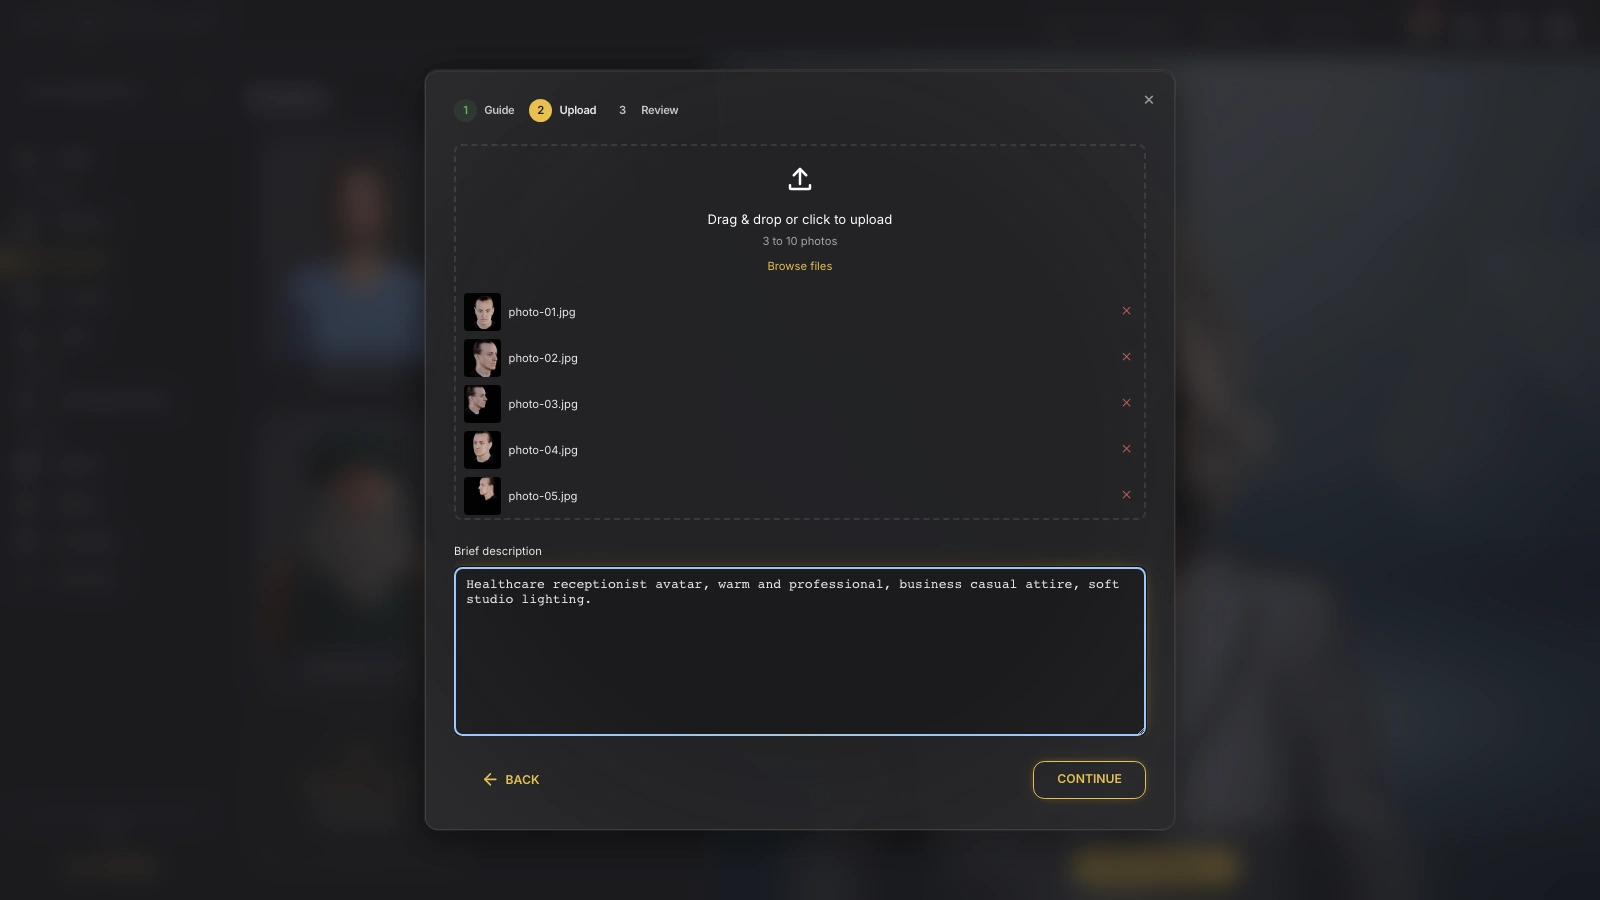
On Upload, drag your photos onto the upload area, or click it – anywhere in it, including Browse files – to pick them from your computer. Several at once is fine. Each staged photo appears under the area with its thumbnail and file name, and the × beside it drops that photo from the set.
-
Still on Upload, use Brief description to tell the team what you have in mind – purpose, style, use case, or any specific needs. The field is optional. Click Continue.
-
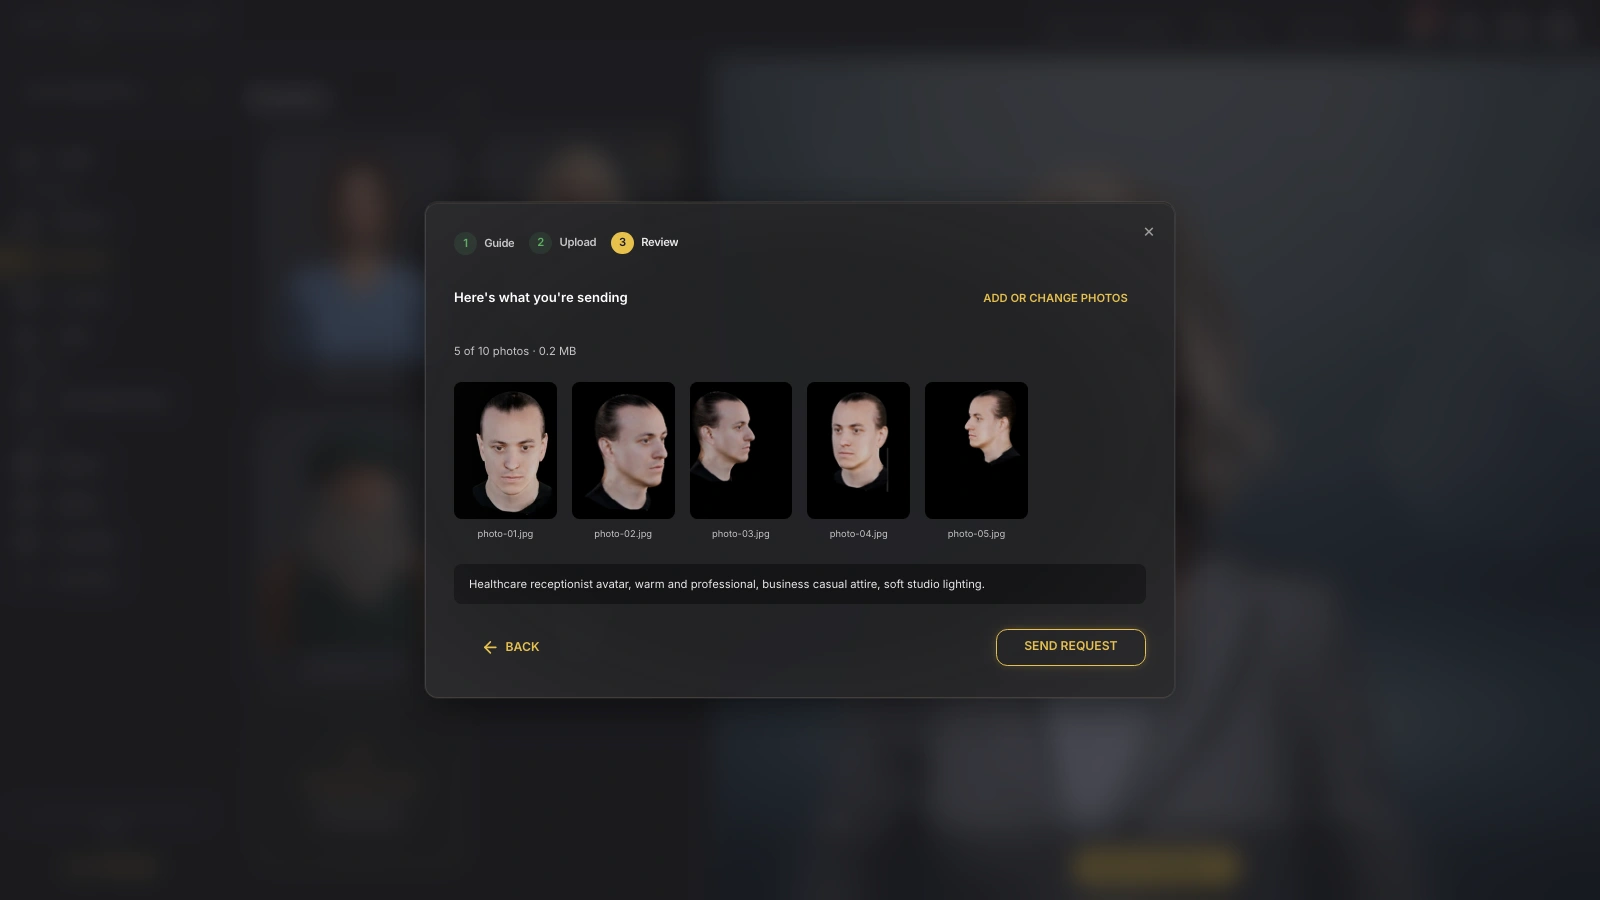
On Review, check what you are about to send: a summary line in the form 5 of 10 photos · 12.4 MB, the thumbnails of every staged photo, and the text of your brief below them. Add or change photos takes you back to Upload.
-
Click Send request. The button stays disabled until at least three valid photos are staged – hover it to see what is missing.
-
A confirmation replaces the wizard, naming the email address our team will write to. Click Done to close it.
As soon as the first photo is staged, the dialog stops closing on Escape or on a click outside it, so a stray click cannot discard the set. The × in the corner still closes it – and closing clears the staged photos and the brief, so your next visit starts from an empty Guide step.
When Something Is Wrong
Genesis Studio checks the set as you build it and says what it refused:
- A file in an unsupported format – the photo is not added, and a message names the file and lists the formats you can upload. Several rejected files at once are reported as a count.
- More photos than the limit – if a batch would push the set past ten photos, none of that batch is added. Remove some photos first, then add the rest.
- Fewer than three photos – Send request stays disabled on Review, and its tooltip asks for at least three.
- No photos at all – Review shows a warning in place of the summary and thumbnails.
- The request fails to send – a message reports the failure and you stay on Review with the photos still staged, so you can click Send request again.
If you would rather start from a character that is ready to go, the AVATARS section lists the AI avatars you can select in Genesis Studio right away. Already have a MetaHuman character of your own? See Your MetaHuman.