Azure AI Agent
This guide walks you through setting up an Azure AI Agent with RAG (Retrieval-Augmented Generation) in Microsoft Foundry, and connecting it to your RAVATAR avatar. It is part of the AI AGENTS configuration flow in the Genesis AI Avatar Studio wizard.
Prerequisites
- A Microsoft Azure account with an active subscription
- Access to Microsoft Foundry
- A RAVATAR account with an active project
Part 1: Create a Project in Microsoft Foundry
- Go to ai.azure.com and sign in with your Azure account.
- Click Create project and give it a name (e.g.,
foundry-file-search-test). - Select or create a Resource Group and Region, then confirm.
- Once created, you'll see the Project Home page with your credentials.
On the Project Home page you can already see your API Key and Project Endpoint — you'll need both of these later for RAVATAR.

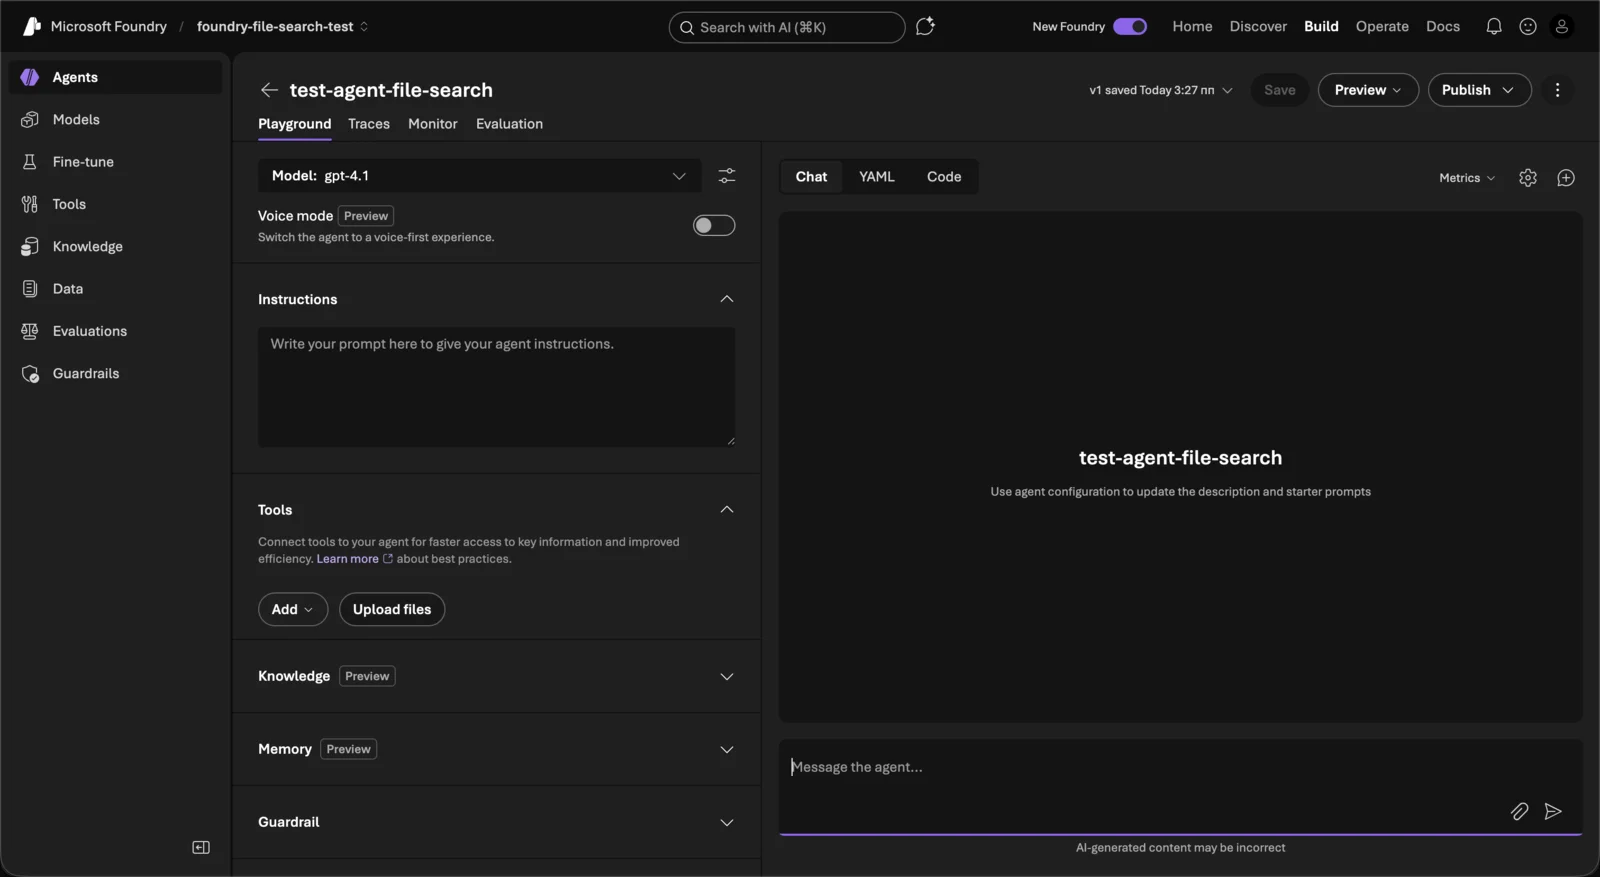
Part 2: Create an AI Agent
- In the left sidebar, click Build → Agents.
- Click the Create agent button.

- Configure your agent:
- Agent Name — enter a name (e.g.,
test-agent-file-search). This is the name you'll provide in RAVATAR. - Model — select your model (e.g.,
gpt-4.1). - Instructions — write a system prompt that describes how your agent should behave (e.g., "You are a helpful assistant that answers questions based on the provided documents.").
- Agent Name — enter a name (e.g.,
Part 3: Add RAG with File Search
The simplest way to add RAG (knowledge base) to your agent is through File Search. This lets you upload documents that the agent can reference when answering questions.
- In your agent's configuration, find the Tools section.
- Click Add → select File search.
- Click Upload files to attach your documents.
- In the Attach files dialog:
- Drag and drop your files or click Browse for files.
- Supported formats: PDF, DOCX, TXT, and more.
- Wait for all files to show the Success status.
- Click Attach.

- After attaching, you'll see the File search tool listed under Tools with your vector index.
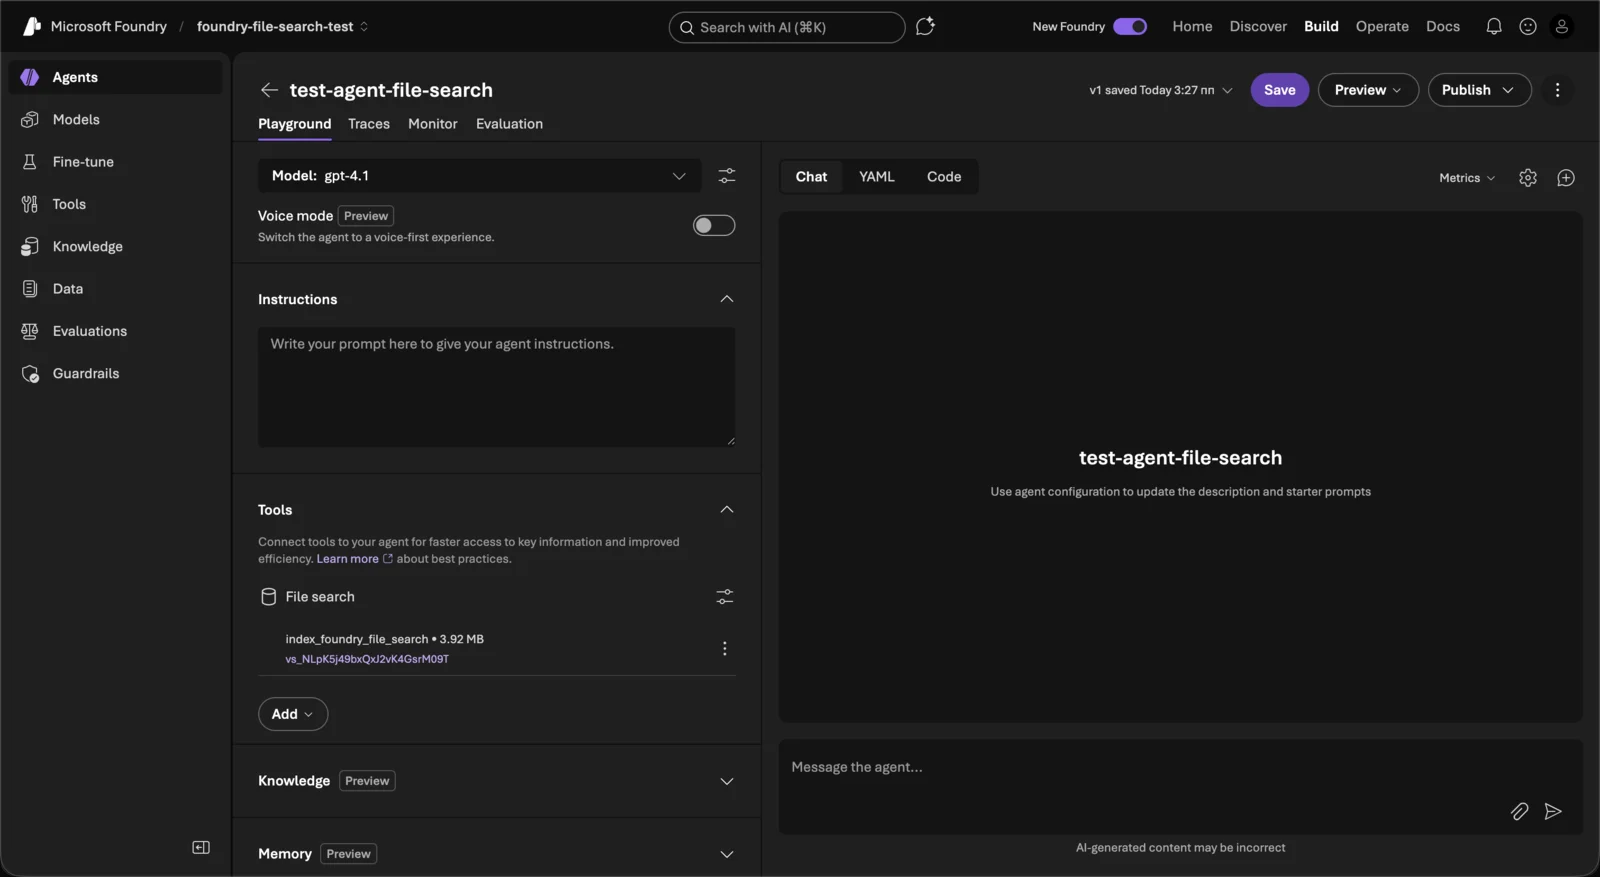
- Click Save in the top bar. Each save creates a new Agent Version (starting from 1).
Part 4: Find Your Agent Name and Version
- Go back to Build → Agents to see the agents list.
- Here you can see:
- Agent Name (e.g.,
test-agent-file-search) - Version number (e.g.,
1)
- Agent Name (e.g.,
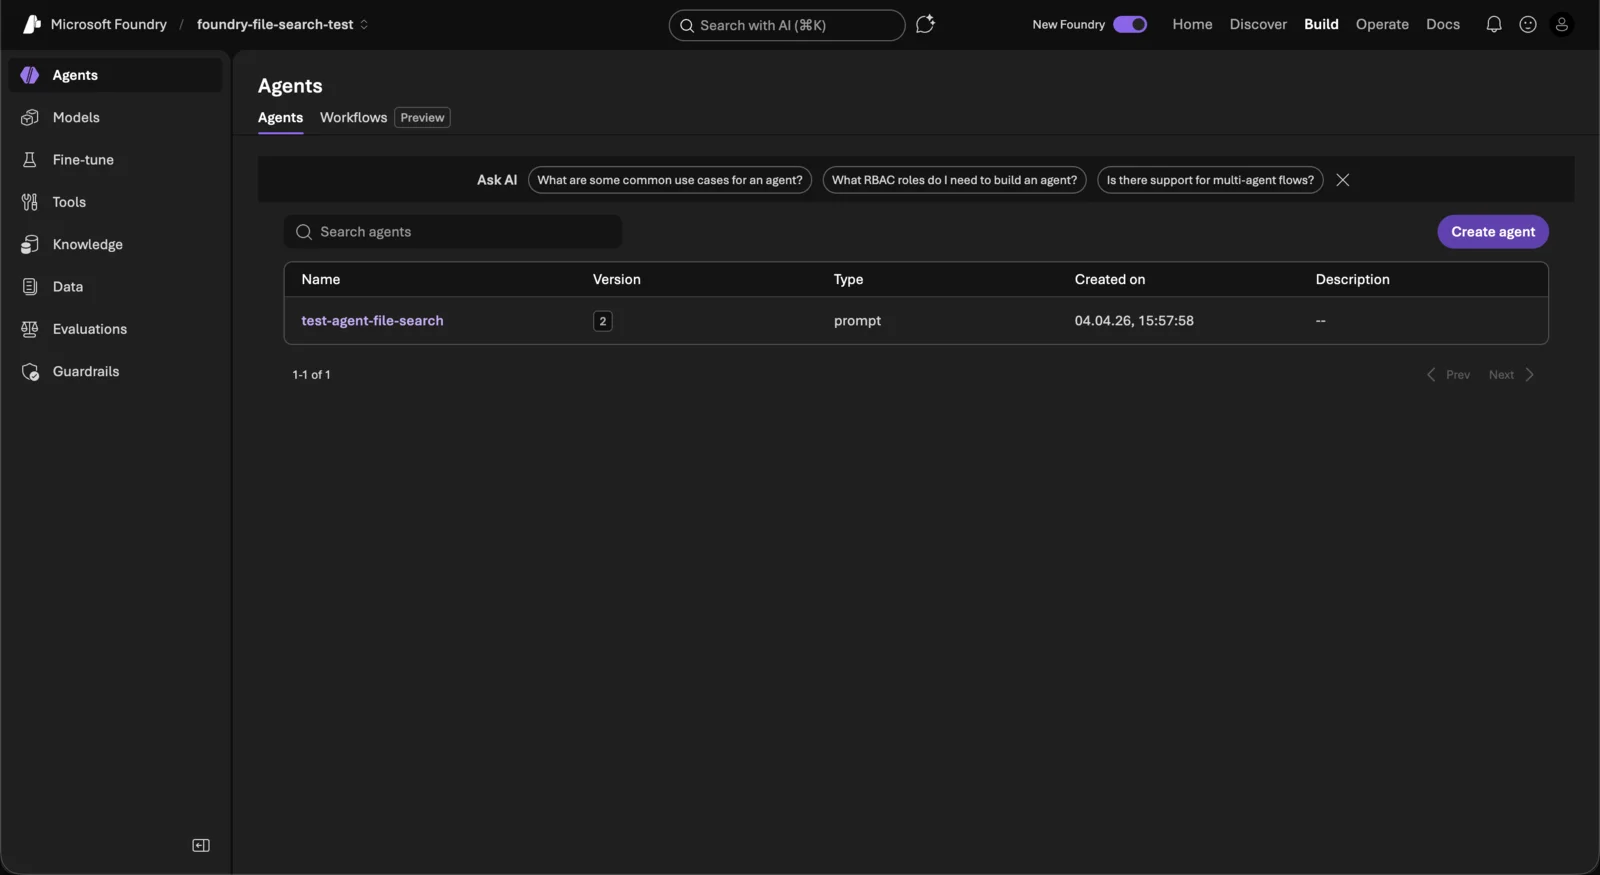
Every time you save changes to your agent, the version number increments. Use the latest version number when connecting to RAVATAR.
Part 5: Collect Your Configuration Values
You need 4 values to connect your Azure AI Agent to RAVATAR. Here is where to find each one:
| Value | Where to Find |
|---|---|
| API Key | Project Home page (Part 1) — click the copy icon next to API Key |
| Project Endpoint | Project Home page (Part 1) — click the copy icon next to Project endpoint |
| Agent Name | Agents list (Part 4) — Name column |
| Agent Version | Agents list (Part 4) — Version column |
Keep your API Key confidential. Do not share it publicly or commit it to version control.
Part 6: Connect to RAVATAR
- Open your project in the RAVATAR Dashboard.
- Go to the AI LOGIC section of the Configuration Wizard.
- Set Logic Source to AI Agents.
- Set Provider to Azure AI Agent.
- Fill in the four fields:
- API Key — paste the API Key from your Foundry project.
- Project Endpoint — paste the full endpoint URL (starts with
https://). - Agent Name — enter the exact agent name (e.g.,
test-agent-file-search). - Agent Version — enter the version number (e.g.,
1).
- Scroll down to Text to Speech and configure your preferred TTS provider and language(s). See the TEXT TO SPEECH guide for details.
- Click Save.
- Click Talk to Avatar to test your connection via the Preview Display panel.
Quick Reference
| RAVATAR Field | Source | Example Format |
|---|---|---|
| API Key | Foundry → Project Home | CR6ZV…OGVL6y |
| Project Endpoint | Foundry → Project Home | https://<project>-resource.services.ai.azure.com/api/projects/<name> |
| Agent Name | Foundry → Agents list | test-agent-file-search |
| Agent Version | Foundry → Agents list | 1 |
Troubleshooting
- Verify that all four fields are filled correctly with no extra whitespace.
- Make sure the Project Endpoint is the full URL starting with
https://. - Check that your Azure subscription is active.
- Confirm the File Search tool is attached and saved.
- Make sure you saved the agent after adding files — the version should increment.
- Use the correct Agent Version in RAVATAR.
- Ensure you are using the API Key from the Foundry project page, not the Azure Portal resource key.
- Try regenerating the key in Foundry if it was recently rotated.
Need Help?
Contact us at support@ravatar.com if you have any questions or run into issues while connecting your Azure AI Agent to RAVATAR.